Give me a passle-load and I'll be a happy girl Monday, September 22, 2008
I've not done a food post in a while and lately I've become obsessed with dumplings. Of the pan fried Chinese variety.I can sit down and tear through them, their soft pillowy goodness offset by the seared and crunchy bottoms. Honestly, there are times when I think I could just go face down into a giant plate of them and die a happy woman. But rather than be shamed at ordering a large number of them at one of the various restaurants that serve them I've opted to make them at home, so when I do eventually consume all 25 dumplings I've cooked up there is no one to shame me with their eyes or comments.
Let me digress a moment, there was a Chinese restaurant next door to the wine shop. They happen to make spectacular Szechuan vegetables, delicious and perfectly steamed. So last week I ordered two orders of them and asked them to hold the rice. For a couple of reasons, one being that I try to avoid white rice being that it is pretty nutritionally void and just filler. I don't need filler. I've got plenty of filler already perched on my belly, thank you. So when I ask her to hold the rice she cackles into the phone "What! Are you on a diet?! HAHAHA!" I don't know how to take this, is she saying I need to diet or that I don't? WTF? Maybe she is just making small talk, whatever. Just give me my damn vegetables.
So anyways, my friend Yumi gave me a good jumping off point for making my own dumplings at home. Here is the humble recipe I've come up with that I like most, and everyone should be impressed that I wrote down actual measurements rather than generalities. If you can get your hands on some garlic chives then use those rather than straight chives, but sometimes they are hard to find.
Also, you may have trouble finding a ground un-seasoned pork. Generally I grab a pork shoulder or pork roast and just have them grind that up for me since most ground pork is seasoned or "sausage". Also I found the pot-sticker wrappers at my local Asian market in the frozen food section. I believe one could substitute wonton wrappers in a pinch though.
Pot Stickers
1/2 pound of ground pork
1/2 pound ground chuck
1/2 teaspoon salt
1 tablespoon Worcester
1 tablespoon soy sauce
1/2 teaspoon onion powder
1 teaspoon sesame oil
5 tablespoons of chives
2 minced cloves of garlic
1 tablespoon of grated fresh ginger
1 package of pot sticker wrappers
Mix all the ingredients together except for pot sticker wrappers. Work the meat and seasonings as little as possible to get the ingredients combined though, don't overwork the meat (haha, why does that make me laugh. Oh, right because I've got the dirty mind of a 13 year old boy).
Place a sheet pan off to the side with a damp towel on top. Also have a damp paper towel to cover the stack of pot sticker wrappers so they don't dry out. Place a small amount of meat in the center of the wrapper, using your fingers moisten the edges of the wrapper with water so they will pinch shut. Try not to leave any pockets of air in the dumpling. Fold in half and crimp closed.
Place on sheet pan and cover with damp cloth.
I practiced with different ways of pinching them shut, but that was just my inner Martha coming out. I ended up leaving one side flat and then fold/crimping the other side. It's hard to explain and I suck at writing down what is clearly a visual process that I'm unable to photograph because I don't have a spare set of hands. Once you get a sheet pan filled you can stick them into the freezer for a couple of hours to harden up. Then transfer to a plastic bag and you are ready next time you need a quick go-to meal.
To cook, take frozen dumplings and put in a hot pan that has been coated with a little oil. Sear the bottoms till they get crispy. Then dump in some water (and I add a little soy sauce) and put a lid on. Steam away for a few minutes until done. Voila! Dinner in 7 minutes.

Labels: Awesomeness, food, recipes

Red Velvet, the dish Wednesday, April 30, 2008
I would dearly love to mail you all these cupcakes- but I fear they would arrive a broken, crumbled mess. I think the only solution is for me to make a cross country road trip stopping in various cities bringing you all my cupcakes*. A modern day Johnny Appleseed, except you know, a woman. And not apple seeds but cupcakes. And you could bet your ass I'm not walking.So not really like Johnny Appleseed at all.
But lets get down to it. For the red velvet cupcakes I used Smitten Kitchen's recipe, usually I would turn to my mother's but I couldn't find it and why not throw caution to the wind and try something new. Her recipe turned out fantastically, it was a deliciously damp cake- blood red, of course with a decent cocoa flavor. The recipe itself it is a bit step heavy, but that I don't fault her for- every red velvet recipe I've read is most certainly be-labored with interesting bits (dissolving baking soda in vinegar- mini volcano in a cup!). I also think Deb has hit upon the right balance of sweet and tang for the cream cheese frosting.
My coworkers were the guinea pigs for these and they all declared them to be the best they'd ever had. Commenting on both the wonderful cake base and frosting.
Decorating the cupcakes was easy-peasy, I used an extra large star tip (like the kind that can be found in this set). Then starting at the edge I make a clockwise swirl using a continuous even pressure (hint: make sure there isn't any air trapped in the bag as it can cause 'hiccups' and mess up your pretty frosting). Once you get the the starting point continue the swirl except move it inward and continue repeating the motion until the cupcake is covered. Upon reaching the center pull up on the pastry bag while releasing the pressure. That should ensure a nice little pointy tip.
Practice really is the key, get yourself some parchment and practice piping frosting onto that. Once you've run out of frosting scrape it off the parchment and back into the pastry bag- no wasted frosting.
For these cupcakes I only filled them about 1/2 full with batter because I wanted the cake to barely crest the tops of wrappers. The recipe makes itself makes a lot of cupcakes done this way- about 48. And because I so liberally frosted them it took 2 batches of the frosting to cover them all.
*Can I please take moment to wonder aloud why "bringing you all my cupcakes." sounds vaguely dirty? Perhaps I just need to be thoroughly kissed to relieve this perceived pervy-ness in my writing.
Labels: Awesomeness, recipes
The weekend, it was nice. Monday, February 25, 2008
This last Friday Yumi and I decided to go out to happy hour. And something unusual happened, we actually went home after 2 drinks like responsible adults!What? Shocking? Am I turning into a boring oldie?
Probably not, considering it was just two weeks ago I was stealing friend's beers and then chugging them when they didn't drink them fast enough. Of course then in my drunken state repeatedly (probably yelling) into my phone that we were out celebrating my friend's divorce. Which really wasn't the case, we were out to give moral support- not celebrating. But at 8 beers that line becomes very much blurred and everything seems like it is more fun. Even divorce.
Granted I wasn't the one getting divorced so I guess that statement could be considered completely bogus and unprovable.
Saturday night I finished a knitted gift for my friend's birthday, well- I need to add the buttons to it and it's done. Hurrah. I also made Orangette's brown butter cookies. Which of course she admonishes bakers to let sit for 2 days to allow the flavors develop. But clearly I couldn't wait, because I lack all self control, and busted into a couple of them post-baking. They are delicious. Make them.
But I did manage to put the rest of them away and am going to use all -2% of the willpower I possess not to eat them until Tuesday.


Labels: beer, drunken shenanagans, recipes
Cars and Cajun food: two wholly unrelated topics Tuesday, October 16, 2007
Last week the weather finally broke and the heat went rushing out. In it's place came perfectly cooler temps, stews, changing leaves and sweatshirts. I finally got to bust out my favorite sweatshirt, my gray MG sweatshirt that I've had since I was 16. It's only appropriate the when the weather finally changes enough that it makes driving a convertible a little less fun that you have something else to look forward to.Next week I'll be driving the Midget to my parents house to store it for the winter and have my mechanic take a look and see he can find that damn short the keeps the blowing the fuse for the control panel. I'm sadder than I thought I would be about storing him up for the winter as it has been an exceptional season of fun. My freckles are starting to fade and I'll miss those too, I fully believe that all that time spent going on drives brought them back full force since I've been pretty freckle free since the last time I owned a Midget.
But Bernard will be back in the spring once the snow melts and the weather turns warm again.
Bernard?
Yes, I finally came up with a fitting name for the Midget. It was a long and decidedly hard thing to do since one wants to choose a name for a car the really encompasses it's spirit. Bernard is a bit crotchety and persnickety but still lovable and fun. And it's pronounced in the British way, not the odd way I've heard my family pronounce it.
This last weekend was cooking club (sorry, for the abrupt transition I can't think of a gentle way to make it flow together today). It was a Cajun feast, Yumi started us off with a amazing spiced crawfish pie.


Summer hosted, and went all out and prepared rabbit. A first for all of us, and it was tender, delicate and moist. And not gamey (which seems to have been every single person's question about it).


For sides Summer made a brussel sprouts with shallot and butter and I contributed a corn souffle. The corn souffle was enough to cause me several hours of worry since it called for canned creamed corn and canned corn. Never ever in my life have I bought canned corn, I buy fresh or frozen (same as my mother). So the canned corned worried me, would it have a slightly metal taste? Be minorly mushy? Luckily it turned out just dandy and everyone loved it. Whew!
Nancy made bourbon balls, they were so alcohol infused that I actually left the room to go stand outside in the cold because I got hot. Bourbon is so warming to me, and the cool of the night air was the only thing that helped. She also brought more of her fantastic apple and thyme martinis, woo! And just like that we were all off the the races.


But her amazing Cranberry Orange Tart is what stole my heart (goddamn that rhymes). I'm quite possibly completely addicted to cranberries, and Nancy is much the same. So when she saw the bags of little red berries in the store for the first time this season she knew she had to make the tart. Thank the infant Jesus she did.
It was so good that the slice I took home didn't make it past coffee on Sunday morning.

And I'm sorry for the blurriness of the photos, I just stopped caring after I downed that first apple and thyme martini.
Crawfish Pie Recipe
6 tablespoons butter
1/3 cup flour
1 cup diced onions
1 cup diced green and red peppers
1 cup diced celery
8 ounce bag of precooked crawfish tails
1 and 1/4 tablespoons tomato paste
1 generous shot sherry (I bet brandy or cognac will work as well)
1/2 chopped green onion
1 tablespoons chopped parsley
2 tablespoons Creole spice
2 ready-made roll out pie crusts
Water or chicken stock
1 egg, for egg wash
Preheat oven to 350 degrees F.
In a skillet melt butter, add flour and whisk into a paste. Cook roux while stirring for 5 minutes or until it begins to turn lightly golden. Add onions, pepper and celery. Cook, stirring, 4 minutes, until vegetables are tender. The mixture will be thick. Splash in sherry to deglaze the pan and mix in the tomato paste. Once that is incorporated, add crawfish, green onions, parsley and seasoning. Then add either water or chicken stock until it reaches the desired texture, a smooth, slightly thick wet mix. Cook just until heated through, about 1 minute more. Let cool slightly.
Roll out pie dough and either split into individual containers or one regular 9 inch pie pan. Pour filling into pie shell and top with remaining dough. Crimp edges well and poke holes in top. Brush the top with the egg wash (this will give a golden color to the top). Bake for 40 minutes, until crust is golden and filling is bubbling hot.
Creole Seasoning:
2 1/2 tablespoons paprika
2 tablespoons salt
2 tablespoons garlic powder
1 tablespoon black pepper
1 tablespoon onion powder
1 tablespoon cayenne pepper
1 tablespoon dried oregano
1 tablespoon dried thyme
Makes 2/3 of a cup
Corn Souffle
1 can cream style corn
1 can whole kernel corn, drained
1/4 c. milk
4 eggs, separated
2 tbsp. flour
1/2 tsp. salt
1/8 tsp. pepper
2 tbsp. melted butter
1/2 c. shredded cheese (optional)
Mix everything in bowl except egg whites. Beat egg whites until stiff peaks form. Fold into corn mixture. Pour into greased souffle pan. Bake at 350 degrees for 20 to 30 minutes or until golden brown. Mine actually took a full hour to cook but since I've not made this recipe repeatedly you might want to check after 30 minutes to make sure yours isn't done and mine was just a fluke.
Cranberry Orange Tart
CRUST:
1 1/2 cups all-purpose flour
2 tablespoons sugar
1/8 teaspoon salt
8 tablespoons chilled butter, cut into small pieces
1/3 cup ice water
Cooking spray
FILLING:
1/3 cup orange juice
2 1/2 tablespoons cornstarch
1 cup sugar
1/4 cup orange marmalade
2 tablespoons chopped walnuts, toasted
1 tablespoon grated orange rind
1 (12-ounce) package fresh cranberries
Preheat oven to 425°.
To prepare crust, lightly spoon flour into dry measuring cups; level with a knife. Combine flour, 2 tablespoons sugar, and salt in a bowl; cut in butter with a pastry blender or 2 knives until mixture resembles coarse meal.
Sprinkle surface with ice water, 1 tablespoon at a time; toss with a fork until moist and crumbly (do not form a ball). Gently press mixture into a 4-inch circle on plastic wrap. Cover and chill for 15 minutes.
Slightly overlap 2 lengths of plastic wrap on slightly damp surface. Unwrap and place chilled dough on plastic wrap. Cover dough with 2 additional lengths of overlapping plastic wrap. Roll dough, still covered, into a 14-inch circle. Place dough in freezer 5 minutes or until plastic wrap can be easily removed.
Remove plastic wrap; fit dough into a 10-inch round removable-bottom tart pan coated with cooking spray. Fold edges under or flute decoratively.
To prepare filling, combine juice and cornstarch in a large bowl; stir well with a whisk. Add remaining ingredients; stir well. Pour mixture into prepared pan.
Bake at 425° for 20 minutes. Reduce oven temperature to 350° (do not remove tart from oven); bake an additional 35 minutes or until crust is lightly browned. Cool completely on a wire rack.
Labels: cooking club, food, midget, photos, recipes
September Cooking Club Monday, October 08, 2007
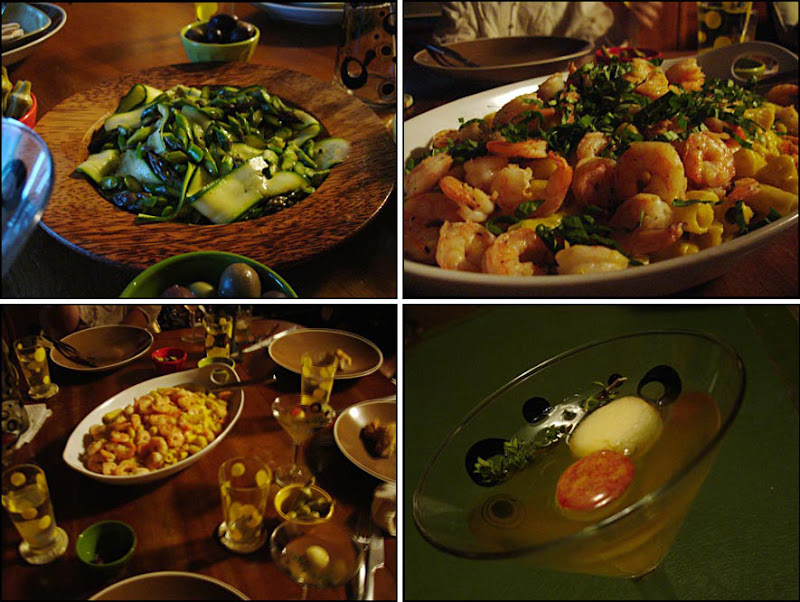
I'll admit, I've been sitting on this post for weeks. I've got absolutely no idea why, it's been typed up and done but apparently I felt the need to regale you all with my talk of crushes and Enrique Iglesas instead. Ptttthhh.When Yumi said she was going to make a butternut squash and prawn pasta dish for cooking club all I could think was "Wha?"
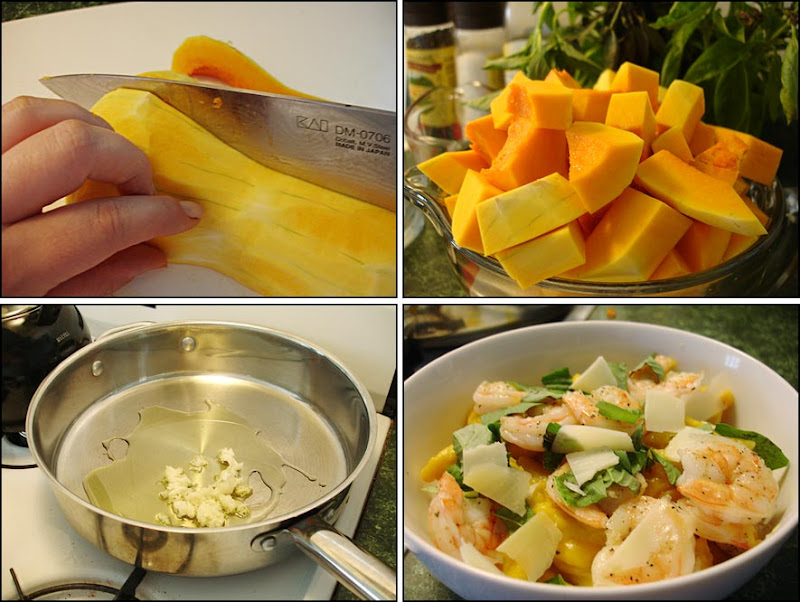
For the life of me I couldn't imagine those two items pairing together seamlessly. But, oh holy jesus, I was wrong. It was delicious, it was creamy, there were perfectly cooked shrimp waiting to be devoured atop the pasta. Sigh. I made this dish at home last weekend and it was still as delicious the second time around as it was the first (see end of post for more photos of it).
I made a starter of cheddar crisps, Yumi's husband Dan declared them "very fancy cheese nips". Which I hope was a compliment, but regardless, I loved them. This was the first of the experiement of attempting to use mostly local ingredients. Local cheddar, local eggs, etc. I'll admit I had to resort to King Arthur Flour because we don't have a mill around here, and my budget can only take so much stretching when it comes to expensive food items. But the local cheddar, which is delicious was resonably priced in my opinion and more delicious than cheddar I might find in Kroger.
Nancy made a lovely veg salad deal, part side dish/part salad. It was so fantastic that I went out and bought all the ingredients the following day and sat down to a big bowl of it for dinner. It was light and simple and not in the least bit heavy, which is a good thing since the weather has turned warm again. (Damnit).
Nancy also brought the lovely Apple and Thyme Martini. Which was perfect, and the beverage of choice for the whole evening. We didn't even bust open the other bottles of wine or lambic.
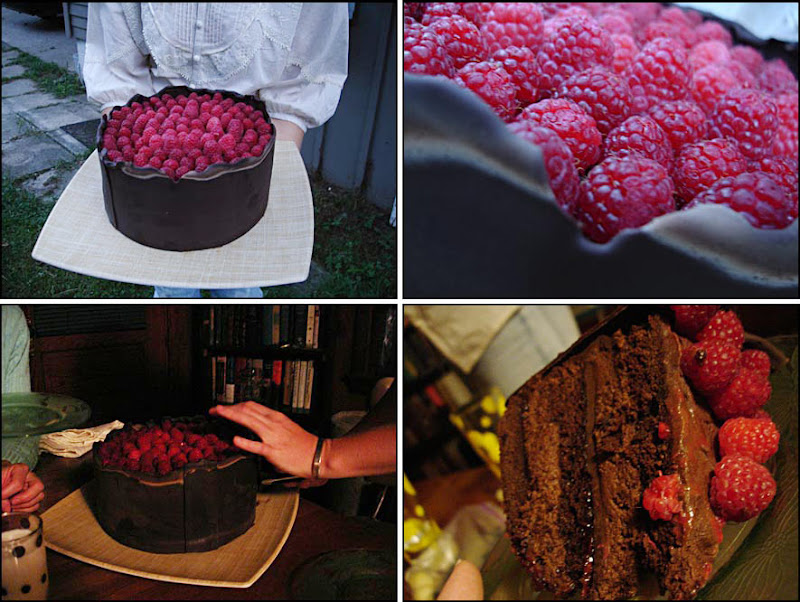
And then Summer had to go blow us all out of the water with her fantastic chocolate cake. It was layer upon layer of chocolate mouse, chocolate ganche, raspberry sauce and chocolate cake. A chocolate lovers dream really.
Cheese Crisps
Orangette
Adapted from Gourmet, November 2006
1 stick (4 ounces) unsalted butter, at room temperature
¾ lb sharp cheddar cheese, coarsely grated (on the large holes of a box grater or in a food processor fitted with the shredding attachment)
1 large egg yolk
1 cup unbleached all-purpose flour
1 tsp dried mustard
¾ tsp salt
1 tsp black pepper, coarsely cracked in a mortar and pestle
1 tsp caraway seeds
Combine the butter, cheese, and yolk in the bowl of a food processor, and blend until smooth. The mixture may seem very thick and lumpy and cement-like at first, but persevere, stopping the machine and scraping down the sides as needed; it will eventually come together into a smooth, thick paste. When it does, add the flour, dried mustard, and salt, and pulse until just combined. Transfer the dough to a sheet of wax paper, and divide it into three portions. [Do not clean the food processor yet.]
Return one portion to the food processor, add the pepper, and pulse until combined well. Or just sprinkle the pepper on top as I did (hi, I'm lazy) Transfer the dough to another sheet of parchment paper. Using the paper as an aid, shape the dough into a log roughly 7 inches in length and 1 ½ inches thick. Roll up the log in the paper, and twist the ends to seal it closed. Clean the processor and dry it well. Make another log on a separate sheet of wax paper in the same manner, using caraway seeds instead of pepper. Place the final, unseasoned portion of dough on another sheet of wax paper, and make it into a log as well. Chill the logs until firm, about 2 hours.
When you're ready to bake the crisps, put an oven rack in the middle position and preheat the oven to 350 degrees Fahrenheit. Line a large baking sheet with parchment paper (or silpat).
Unwrap one log and, using a knife (or a cheese cutter), cut enough thin slices – about 1/8 inch thick – from it to cover the baking sheet, arranging the slices about 1 inch apart. Bake the crisps until their edges are golden, about 10-12 minutes. Transfer them on the parchment to a rack, and cool them slightly, about 15 minutes. Repeat with the remaining dough.
Serve crackers warm or at room temperature.
Note: The dough can be chilled, wrapped in foil or a plastic bag, for a week or frozen for up to two months. The crackers can be baked a few days ahead and cooled completely, then stored in an airtight container at room temperature. If you like, you can reheat them on a baking sheet in a 350-degree oven for about 5 minutes.
Yield: about 100 crackers


Apple and Thyme Martini
Giada DeLaurentiis
Ice
10 ounces vodka
6 ounces apple juice
1/4 cup thyme syrup, recipe follows
1 large apple, peeled
4 fresh thyme sprigs
Special equipment: melon baller
Chill the martini glasses.
Fill the shaker with ice. Combine the vodka, apple juice, and thyme syrup in a martini shaker. Shake for about 10 seconds. Divide between the 4 chilled martini glasses.
Use the melon baller to scoop out small balls of apple. Place 3 balls of apple and 1 sprig of thyme in each glass for garnish. Serve immediately.
Thyme Simple Syrup:
1 cup sugar
1/2 cup water
5 large sprigs fresh thyme
In a saucepan combine sugar, water, and thyme over medium heat. Bring to a boil, reduce heat and simmer until the sugar has dissolved, about 5 minutes. Take the pan off the heat and cool the syrup. Any extra cooled syrup can be saved in an airtight container in the refrigerator.
Asparagus and Zucchini Crudi
Giada DeLaurentiis
2 zucchini, trimmed
1 bunch asparagus, trimmed
1/4 cup extra-virgin olive oil
2 tablespoons lemon juice
1/2 teaspoon salt
1/4 teaspoon freshly ground black pepper
1 ounce shaved Pecorino Romano, for garnish
Using a vegetable peeler, shave the zucchini into long thin strips. Thinly slice the asparagus on a diagonal. Toss the slices together and place the salad in a serving bowl.
In a small bowl, combine the olive oil, lemon juice, salt, and pepper. Stir to combine and drizzle over the vegetables. Toss to coat. Garnish with the pecorino shavings. Serve.
Rigatoni with Squash and Prawns
Giada DeLaurentiis
3 tablespoons olive oil, plus 3 tablespoons
1 pound butternut squash, trimmed and cut into 1-inch cubes
2 garlic cloves, minced
1 teaspoon salt, plus 1 teaspoon
1/4 teaspoon freshly ground black pepper, plus 1/2 teaspoon
1 cup vegetable stock
1 pound rigatoni
1 pound prawns, peeled and deveined
3/4 to 1 cup whole milk
1/2 cup chopped fresh basil leaves
1/4 cup grated Parmesan
Warm 3 tablespoons of olive oil in a large, heavy skillet over medium-high heat. Add the butternut squash, garlic, 1 teaspoon salt, and 1/4 teaspoon freshly ground black pepper. Saute until the squash is golden and tender, 5 to 7 minutes. Add the vegetable stock, bring to a simmer, cover and cook until the squash is very soft, another 5 to 7 minutes. Transfer the squash mixture to a blender or food processor and puree.
Bring a large pot of salted water to a boil over high heat. Add the pasta and cook until tender but still firm to the bite, stirring occasionally, about 8 to 10 minutes. Drain pasta.
Meanwhile, warm the remaining 3 tablespoons of olive oil in a large, heavy skillet over medium-high heat. Sprinkle the prawns with the remaining 1 teaspoon of salt and remaining 1/2 teaspoon of freshly ground black pepper. Add the prawns to the pan and cook until just pink, about 3 minutes.
In a large pot over low heat combine the cooked pasta, pureed squash mixture, and 3/4 cup milk. Stir to combine. Add the remaining 1/4 cup milk if the sauce needs to be moistened. Add the cooked prawns, basil, and cheese. Stir until warm and serve.
And of course the recipe for Summer's Triple Chocolate Cake is entirely too long, so I'm only going to provide a link to it.
Triple Chocolate Cake
http://www.epicurious.com/recipes/food/views/105184
And because I took more photos of the butternut squash when I cooked it myself last weekend:
Labels: cooking club, photos, recipes
Dish-pan hands Monday, September 17, 2007
I went into cooking overdrive this weekend, spurred on by cooler temps that allowed me to turn the oven on. There were cheese crackers, carrot cake cookies, tortilla de patatas and minor prep work for several other dishes. And the dishes, oh, the dishes. I swear I washed everything at least 3 times this weekend. Possibly more, hence the poor, rough state of my hands.I missed the farmer's market last week because of a shopping trip to Parkersburg (with it's real mall), and this week it was like a whole different scene. Gourds and squashes galore! I couldn't find a single zucchini anywhere and the peaches had been replaced with apples. I'm not complaining but it was just another sign (like the cooler weather) that fall is upon us.
I've been a bit of a neglectful aunt as of late, my oldest niece's birthday was at the end of July and I promised to make her cookies for it. But with the triathlon being at the end of July as well (and the ridiculous heat) all cookie making was put on hold. Now, though, my other niece's birthday is Friday and I was in danger of having the whole best-aunt-ever title fall from my hands if I totally cocked up didn't have at least one of their birthdays done.
My sister helpfully supplied the information that her kids had just discovered carrot cake and they love it. So I set about to come up with a carrot cake cookie since actual cake would not travel well, neither would cream cheese frosting. So I improvised a bit, using the oreo cookie frosting and culling together a recipe for the cookies. I hope like hell she likes them.


These cookies are heavy on the spice so if you are delicate flower when it comes to fall-esque spices please reduce the quantities. Also, they are very nutty- another personal preference and sans raisins because my sister was unsure of how the kids would feel about cooked raisins.

Carrot Cake Cookies
Skeezix
1 cup of walnuts (or pecans)
1 cup of grated carrot (finely)
1 stick of butter (room temp)
1/3 cup of brown sugar
1/3 white sugar
1 egg
1 tablespoon vanilla
1 cup of flour
2 teaspoons cinnamon
1 teaspoon nutmeg
1 teaspoon ginger
1/2 teaspoon baking soda
1/2 teaspoon salt
Pre-heat oven to 375.
Cream together the butter and sugar, once light and fluffy add the egg and vanilla and beat until combined. I roasted my pecans in the oven just for a moment and then coarsely chopped them. Add the nuts and finely grated carrot to the butter/sugar mixture and stir to incorporate.
In a separate mixing bowl, gather all your dry ingredients and then combine them with the wet. At this point I've ditched the mixer and go for my rubber spatula, it helps prevent me from over-working the dough.
Using a 1/2 ounce disher, scoop and place onto a parchment (or silplat) lined cookie sheet. Why? Because I'm very lazy and scraping cookie bits off my sheets is my least favorite kitchen activity. Ever.
Bake for about 10 minutes or until the cookies have gotten a bit brown at the edges. These cookies won't spread too terribly much, which is fine with me since I prefer them to be moist little heaps of goodness. But if you would prefer a thinner cookie, then by all means you should flatten them a bit before they go into the oven.
Cool completely.
Oreo Frosting
1/4 vegetable shorting
1/2 stick of butter (room temp)
2 cups confectioners sugar
2 teaspoons vanilla
Again, cream the veg shortening and butter together and slowly add the confectioners sugar and vanilla. Whip until light a fluffy, approximately 5 minutes. Wiping down the bowl intermittently to make sure everything receives the same treatment.
After the cookies have cooled, line them up- bottom side facing you. Fill a pastry bag with the frosting (or just use a ziplock bag with a tiny corner snipped off as I do). Create a circle of frosting on the bottoms of half the cookies. I usually start with the outer circle and fill the center in a sort of swirling motion.
Press the be-frostinged halves with the unfrosted cookies.
I make a double batch of the cookie portion and it will yield about 30 sandwich cookies. So you could expect 15 sandwich cookies from a single batch. A single batch of frosting will more than amply cover 30 sandwich cookies.
Fajitas and Cake Monday, September 10, 2007
First off I've got to say, Browns, if this is how you are going to perform this season I'm massively disappointed. It's the Steelers and the home opener and the best you could fucking do is 7 points?I've not done a cooking post in a good long time (cooking club not-withstanding), but really I've not been cooking a whole lot. The heat is getting me down and when that happens food is usually the last thing on my mind (beer and other adult beverages on the other hand are an entirely different story).
But there is something about the heat that lends itself to grilling, and when I get sick of the brats and burgers I lean towards one thing- fajitas. Thinly sliced, medium rare steak with grilled peppers and onions, with the traditional toppings of guacamole and sour cream. And also since I've now got a gas stove I've been heating the tortillas on that so they are warm and pliant with just the tiniest bit of char.
I don't go in for a super heavy rub on the fajitas because I prefer not to overwhelm the natural taste of a good piece of streak. Instead I got with a simple marinade that plays well with all the flavors that will be in fajitas.
Fajita Marinade:
Flank Steak
2 teaspoons of cumin
2 teaspoons of coriander
1/4 cup lime juice
2 tablespoons of olive oil
Marinate for at least 4 hours and up to overnight. Sear steak on a hot grill until it reaches your preferred doneness.
Not that the above is much of a recipe but what follows for the rest is less of recipe than most. I slice a bunch of peppers, if I'm lucky I can pick up some different colors at the farmer's market. I combine those with sliced onions and toss onto the grill. Unfortunately this is the part I've still not managed to master: not losing a majority of these through the grates of the grill.
As for the guacamole, it is a deeply personal issue to say the least, there are those that prefer to add tomatoes, onion and garlic to theirs. Personally I'm more a purist, I don't want anything getting between me and avocados. So I just go for simple lime juice, salt and mashed avocado.

But really, I'm longing for cooler temps and comfort food. I could go in for some low 60's, maybe even 50's where I can cozy up to a bowl of stew, cabbage rolls or even a good pot roast dinner with mashed potatoes and gravy.
Instead I consoled myself with cake. Not usually a cake fan, this dark, dense beauty is heavy but still fairly unsweet. I don't care for cakes and other sweets that make my teeth hurt, instead I prefer something that is sweet but still a hint of savory buried in it's depths. I think Guinness and chocolate are a natural pairing, and I must thank Nigella Lawson for this most fantastic recipe (which I've made so many times in the last year the book naturally opens to that slightly beer stained page that holds the recipe).
It doesn't hurt that I wanted to do some photography this weekend that didn't involve tiny little pieces of guitars. Although I am not happy with what I shot, I blew out the white of the frosting and just couldn't get into the groove of shooting (I can't even believe I'm going to post these actually I'm so embarrassed). It was highly dissappointing since I'd hauled all the equipment to shoot in my kitchen, but at least at the end of the shoot I got to eat cake, right?


Nigella Lawson
Feast
Chocolate Guinness Cake
For the Cake:
1 cup Guinness
1 stick but 2 tablespoons unsalted butter
3/4 unsweetened cocoa
2 cups of superfine sugar
3/4 sour cream
2 eggs
1 tablespoon of pure vanilla extract
2 cups of all-purpose flour
2 1/2 teaspoons of baking soda
For the Topping:
8-oz of cream cheese
1 1/4 cups of confectioners' sugar
1/2 cup heavy cream
Preheat the oven to 350 degrees and butter and line a 9 inch spring-form pan.
Pour the Guinness into a large wide saucepan, add the butter in slices and heat the until the butter until melted at which time you should whisk in the cocoa and sugar. Beat the sour cream with the eggs and vanilla and then pour into the brown, buttery, beery pan and finally whisk in the flour and baking soda.
Pour the cake batter into the greased and lined pan and bake for 45 minutes to an hour. Leave to cool completely in the pan on a cooling rack, as it is quite a damp cake.
When the cake is cold, sit it on a flat platter or cake stand and get on with the frosting. Lightly whip the cream cheese until smooth, sift over the confectioners' sugar and them beat them together (I use less sugar than called for because, again, I don't go for overly sweet frostings). Or do this in the processor, putting in the confectioners' sugar first and blitz to remove lumps before adding the cheese.
Add the cream and then beat again until it makes a spreadable consistency. Ice the top of the black cake so that it resembles the frothy top of the famous pint.
(Now if you do follow my suggestion for less sugar, which is what gives this frosting it's bit of stiffness be prepared that it might be more malleable that you expect if you add the full measure of cream. Of course you can always cut back on the cream and depending on my devotion to my health that day I occasionally do but otherwise I just deal with a slightly softer frosting. Either way I've had no complaints when it comes to this cake.)
Brownies Friday, May 25, 2007
Seriously, is there anything better about being an adult than the fact that you can have only brownies for dinner and no one yells at you?Because there might not be.
Everyone should make these, which are better the day after if tightly covered. They get denser and fudgy-er.
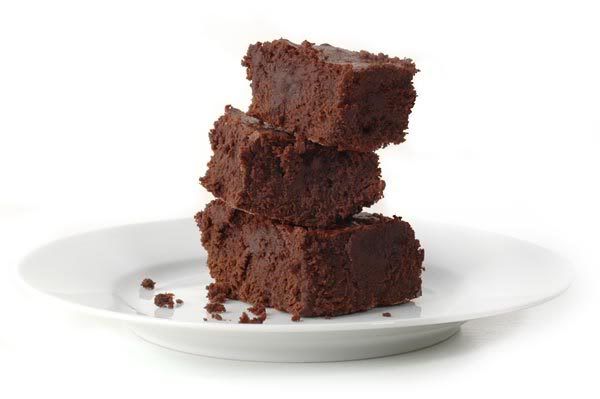
Cocoa Brownies
Alton Brown
Soft butter, for greasing the pan
Flour, for dusting the buttered pan
4 large eggs
1 cup sugar, sifted
1 cup brown sugar, sifted
8 ounces melted butter
11/4 cups cocoa, sifted
2 teaspoons vanilla extract
1/2 cup flour, sifted
1/2 teaspoon kosher salt
Preheat the oven to 300 degrees F. Butter and flour an 8-inch square pan.
In a mixer fitted with a whisk attachment, beat the eggs at medium speed until fluffy and light yellow. Add both sugars. Add remaining ingredients, and mix to combine.
Pour the batter into a greased and floured 8-inch square pan and bake for 45 minutes. Check for doneness with the tried-and-true toothpick method: a toothpick inserted into the center of the pan should come out clean. When it's done, remove to a rack to cool. Resist the temptation to cut into it until it's mostly coo
Cooking Club: Bagels Monday, April 30, 2007
Cooking Club- Session 5 consisted of bagels, laughter, drinks, sunshine and euchre.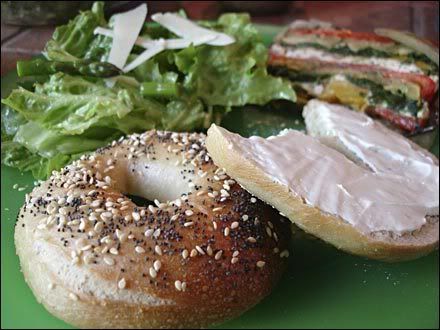
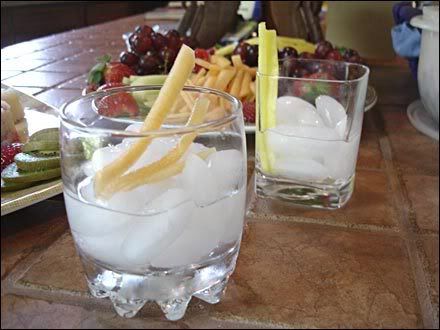
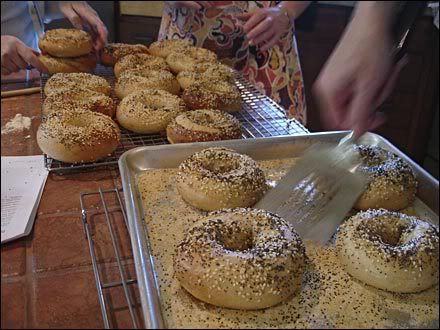
Nancy hosted this month and settled on making bagels. She opted to try two types, one tried and true recipe and one new one. The tried and true came closest to turning out a typical bagel, the second method was more of non-bagel. More like some sort of sweet bread in my opinion.
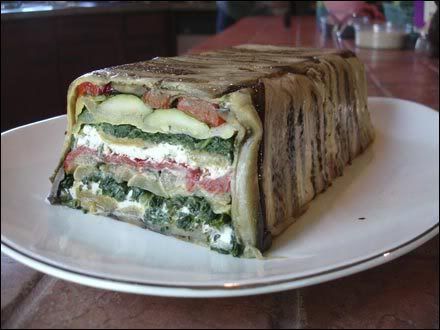
Yumi made a vegetable terrine, Kate made a salsa with beans, corn and cilantro (which I couldn't eat since cilantro tastes like soap), Val made a delicious salad with asparagus and I made a chocolate lime cheesecake.
The cheesecake turned out well, except by the time we got around to it it had been out of the fridge for 4 hours. Much longer than it should have been, so it was a bit soft in the middle. Next time I would immediately put it into the fridge, but time escaped from us and I totally forgot about it.
I will post the recipe for the tried and true bagels once I get it from Nancy, for now here is the vegetable terrine:
Roasted Vegatable and Goat Cheese Terrine:
Yumi
1/2 cup olive oil, plus extra for oiling pans
1 (1-pound) globe eggplant, stem and bottom ends trimmed, cut lengthwise into 1/4-inch slices
1 pound zucchini, stem and bottom ends trimmed, cut lengthwise into 1/4-inch slices
1 1/2 pounds yellow squash, stem and bottom ends trimmed, cut lengthwise into 1/4-inch slices
Salt and freshly ground black pepper
10 ounces soft, mild goat cheese (herbed)
2 tablespoons extra-virgin olive oil
2 large red bell peppers (about 1 pound), roasted, cored, seeds and skins removed, cut into 3 or 4 large pieces
16 ounces fresh spinach, washed, stems removed, then blanched, squeezed dry, and coarsely chopped
2 large yellow bell peppers (about 1 pound), roasted, cored, seeds and skins removed, cut into 3 or 4 large pieces
Preheat the oven to 425 degrees F.
Line 2 large baking sheets with aluminum foil and lightly grease with olive oil. Arrange some of the eggplant, zucchini, and yellow squash slices in a single layer on the sheets, slightly overlapping them. Brush with olive oil and lightly season with salt and pepper. Bake until soft and just golden around the edges, 8 to 10 minutes. Remove from the oven and transfer to a plate to cool. Repeat with the remaining vegetable slices.
In a large bowl, combine the goat cheese with the basil, parsley, and extra-virgin olive oil. Season, to taste, with salt and pepper and mix well.
In a 6-cup terrine (12 by 3 by 3 inches), arrange the eggplant slices crosswise over the bottom and up the sides, overlapping the slices to completely cover the terrine. The ends of the slices should overhang the sides of the terrine. Top the eggplant with thin layers of red bell pepper, zucchini, yellow squash, spinach, and yellow bell pepper.
Crumble a layer of the goat cheese mixture on top of the yellow bell pepper, and repeat the layering with the remaining vegetable slices. Bring the overhanging eggplant slices up over the terrine. Wrap the terrine loosely in plastic wrap. Top with an equal-size terrine or a piece of cardboard wrapped in aluminum foil. Place a brick or heavy pot on top of the terrine and refrigerate for at least 8 hours or for up to 24 hours.
Remove the terrine from the refrigerator. Remove the weight and unwrap. Slice with a very sharp knife.
Labels: cooking club, food, recipes
